There’s been lots of buzz surrounding Content Aware Fill in Photoshop CS5 but I’ve seen a bit less about the updates to the photo merge and HDR features. These were the tools I was most interested in taking for a spin when I installed the upgraded applications. If they delivered at making it easy to create High Dynamic Range Photographs, particularly that are more photorealistic then fantastical and candied looking, then it would save me from buying other apps to do that processing or forgetting the genre existed all together.
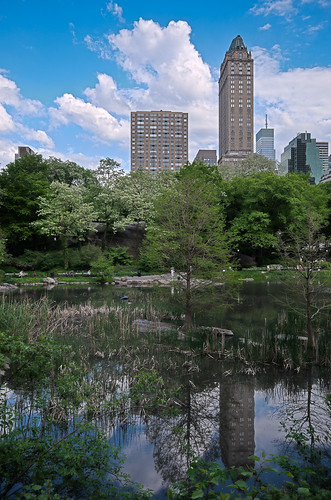
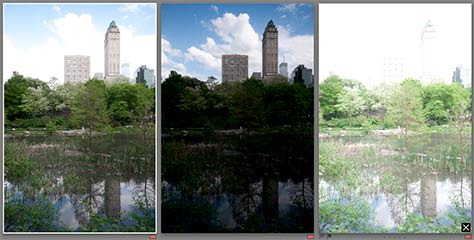
After watching a video of the new HDR Pro features and some desire to play with new toys firmly seeded I decided to rattle off a few bracketed exposures while in Central Park earlier this week and give the new HDR Pro a spin. I hadn’t gone out intending to shot for HDR and without a tripod the handheld, roughly steadied and quickly taken photos aren’t the best platform to use for an analysis of the application. Still, I have to say I was really happy with the results and the lack of manual input and fighting in the process. Features like image alignment and the new ghost removal features performed better then expected and gave me passable results.
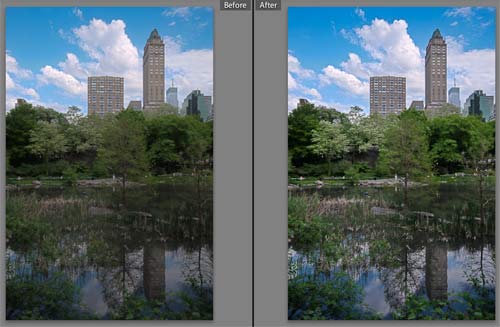
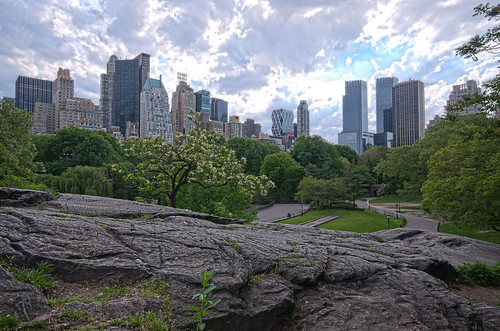
I’ll leave the in depth analysis and comparison between tools to other people, but I thought it would be helpful to others to see a quick rundown of my proces to create the two photographs featured.
Input & Setup
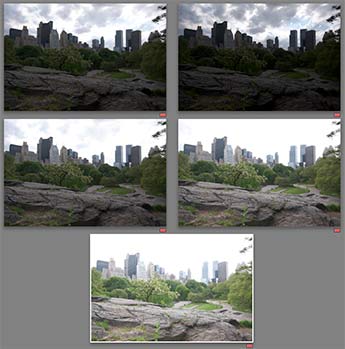
I wasn’t really out expecting to shoot photos for use as HDRs, I was just walking around Central Park between meetings with a Nikon D90 [3 shot bracketing], 10-20mm lens and no tripod. So as the lighting got rough for the wider landscapes I did my best steady shooting and fired off a few image sequences in different parts of the park. Once back in Lightroom I processed the images with a pretty flat baseline setting [killing sharpening, flattening curves & black point, etc.] and then followed the workflow Matt outlined from there to process 2 sets of images — a 3 shot sequence and a 5 shot sequence.
HDR Pro Workflow
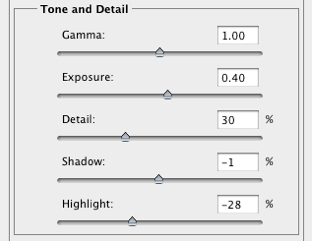
After chugging along a little while importing the files I poked around the presets to see what could be done with the HDR app. the range of presets covers all the bases – from way over processed and stylized to far too flat, but none were right for more then a starting point for my style and photos. Picking the photorealistic preset I got to work adjusting sliders and the tone curve. Turning on Ghost Removal and cycling through the images in the sequence made a big difference and help remove some weird artifacts in the fast moving clouds.
Sliders were tweaked until I had a clean and somewhat flat image — for these images raising the Exposure up and then bringing the Highlights back down seemed to result in the most desirable and even overall exposure. After getting a result I liked I closed the HDR Pro dialog and saved the image as a TIFF and switched back to Lightroom to finish processing the photograph.
Finishing back in Lightroom 3 Beta 2
Since I started with unprocessed photos and didn’t take the stylizing of the image very far in Photoshop I was left with a bit of a boring image when I was done. Turning back to Lightroom [or you can use Camera Raw] I made some final tweaks to the image adjusting the saturation, tone curve, sharpening and all the normal processing I’d do to a single image coming off my camera.
Results
While seasoned HDR vets may have other styles of working or a need for additional settings the HDR Pro updates in Photoshop CS5 are enough to make this particular landscape photographer happy and keep me from looking for other options. That’s something I can’t say for the CS4 offerings.
Learn More
- Adobe Photoshop CS5 Learning Center
- HDR — Lightroom, Photoshop CS5 & Photomatix? at Inside Lightroom
- What’s new in Photoshop CS5 at Adobe.com
Comments Temporarily(?) Removed